I started these on my recent visit to Shetland. Life has been (and remains) busy but today I’m putting some time aside to work on the hand warmers. The first one of them anyway. I figured I’d share some pictures, on the off-chance someone finds them useful. When I started, the one thing I found most challenging was finding examples of where the naal and the loops should go and what they look like.
To start with, this is where I’m up to:
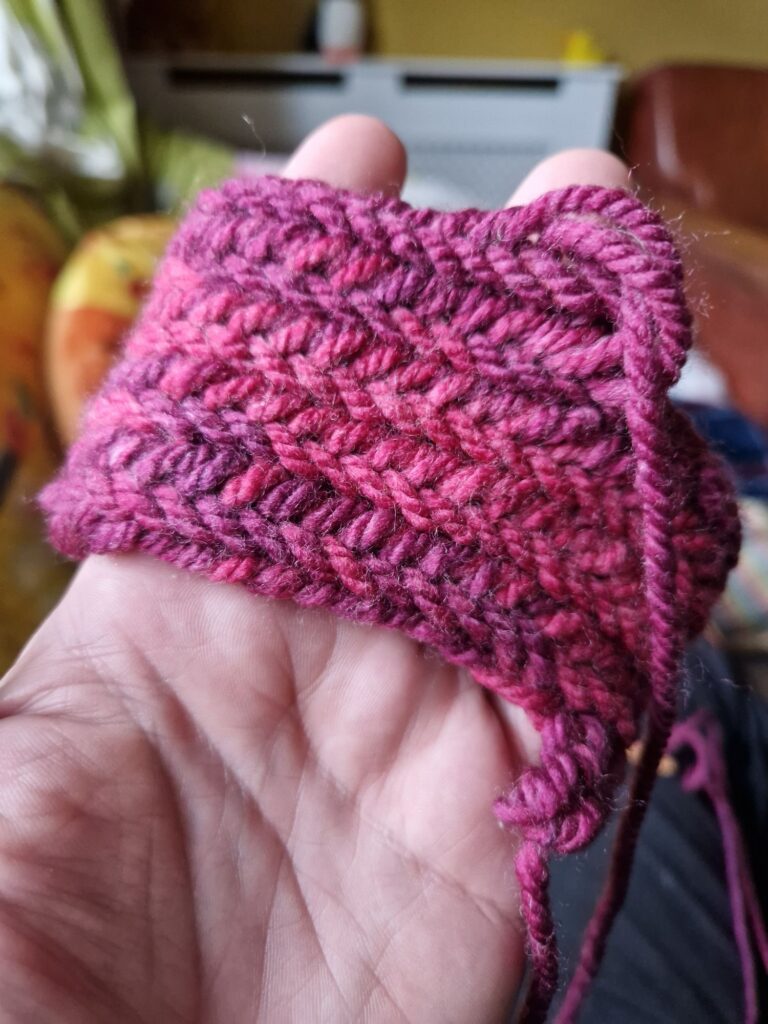
The stitch is particularly dense because I want these things to REALLY keep my hands warm. The yarn is Hayfield Spirit Chunky 405 Casper and rather than try and felt it, I’m connecting lengths with a uniknot.
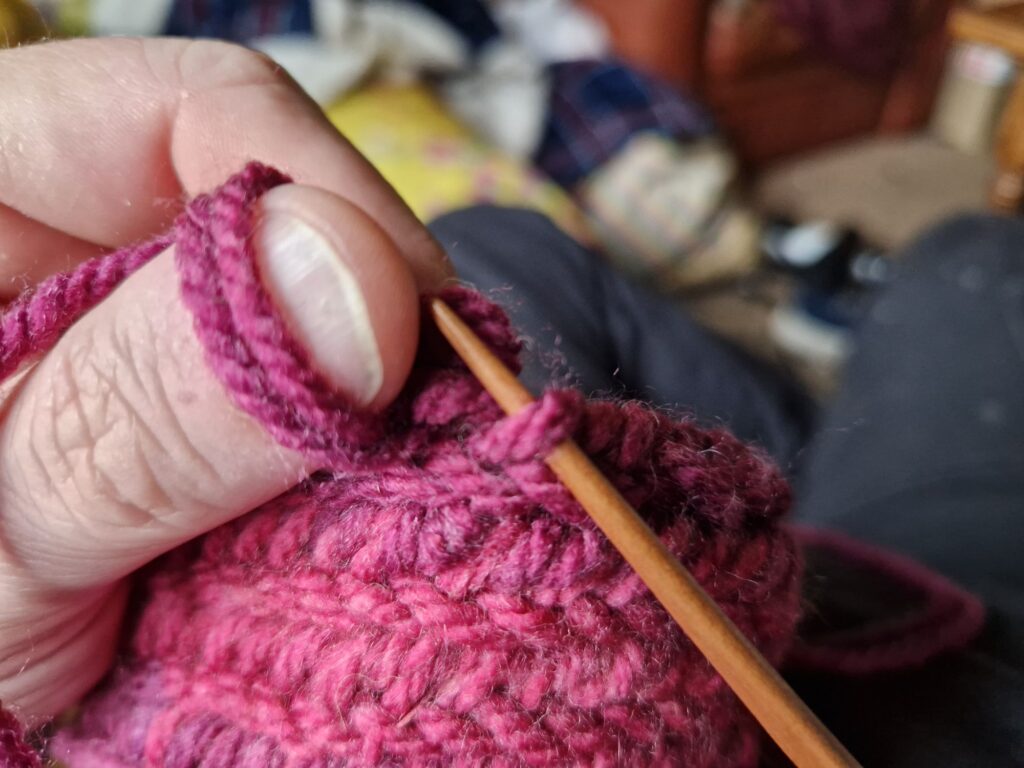
As this is Finnish 2+2, I’m picking up two loops from the previous row and passing the naal through one of the two loops on my thumb, and one loop behind it. As such:
Picking up loop #1 from the previous row.
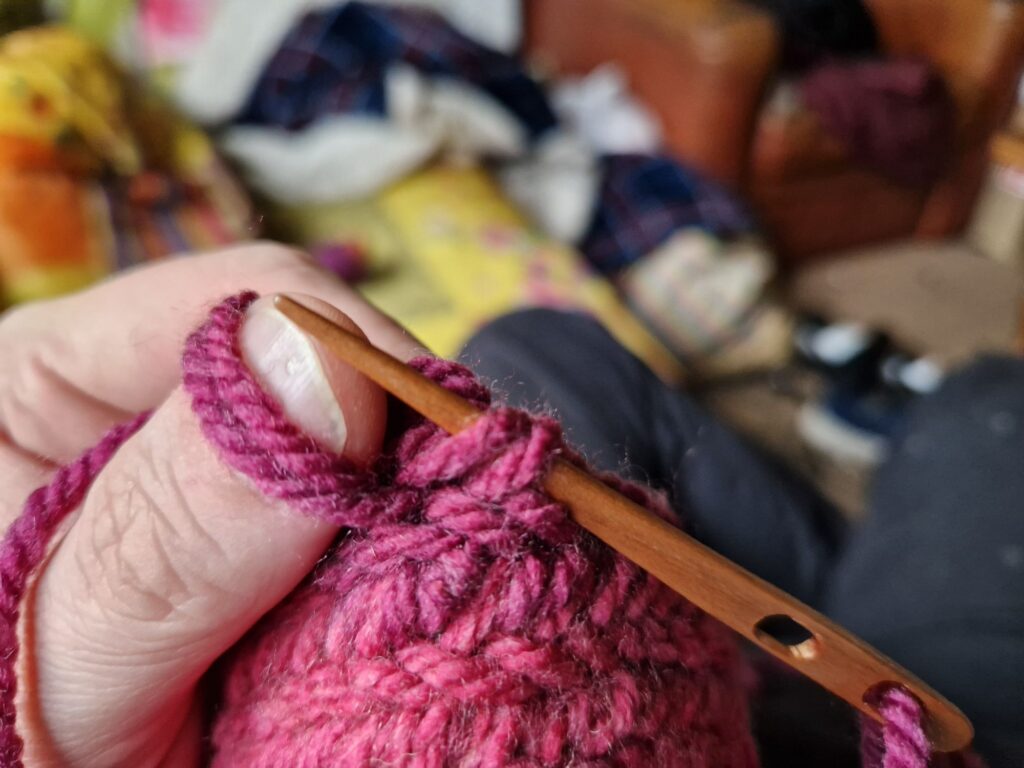
Picking up loop #2 from the previous row.
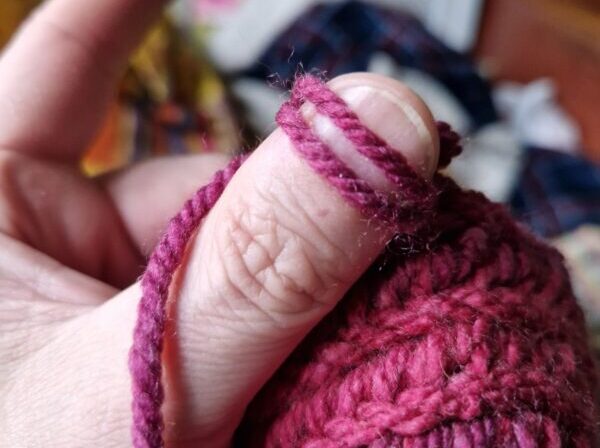
Passing the naal through the first loop on my thumb (the second/lower loop is the most recent one from the latest stitch) and the loop behind my thumb.
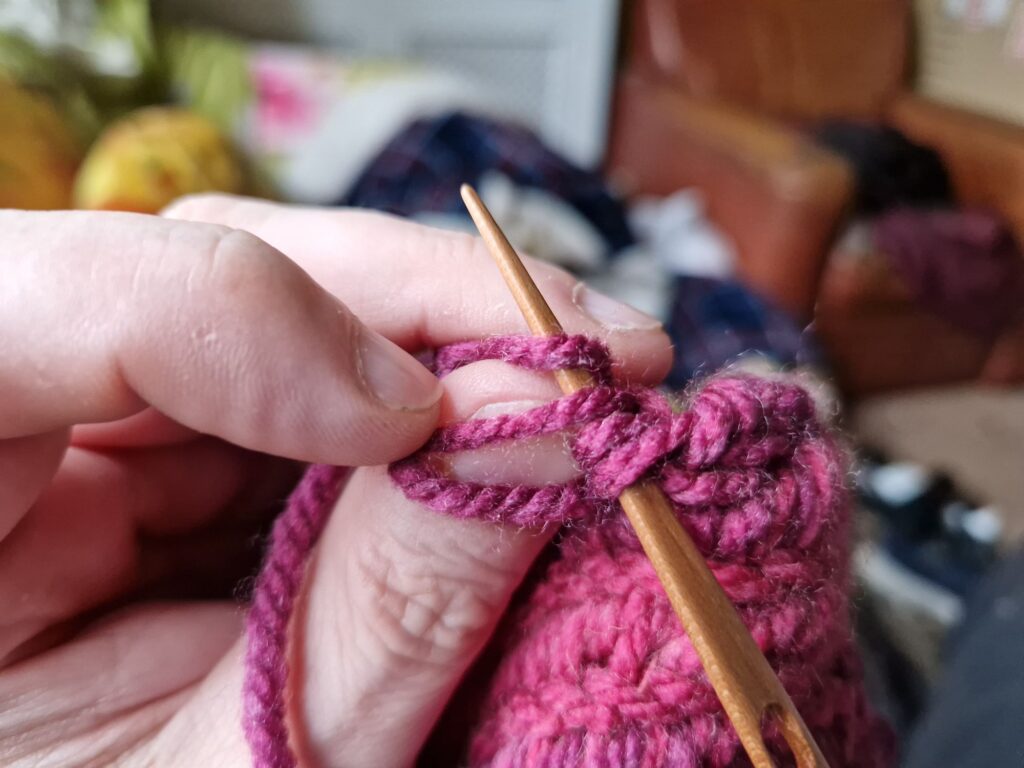

Here you can see, from right to left, the four loops on the naal, my thumb loop (from the previous stitch) and my working yarn. As with other stitches, the naal is passed down behind the recent thumb loop and working yarn to create the new loop.
I’m finding that every 6-8 stitches, if I squeeze my thumb and forefinger together to hold the yarn, a few gentle tugs on the stitches to the left tensions them and evens them out. It also gives me an opportunity to “pop” any obvious knots through to the back of the work.
I’ll keep working on this round and placing it on my left hand from roughly where I want it to start on my wrist, until I get the round even with the base of my thumb. Then I’ll start the second mitten in the same way, working it up to the same number of rounds. I’ll keep the same number of stitches per round, but check it against my right hand before I join the first row, just in case my hand is a different size.